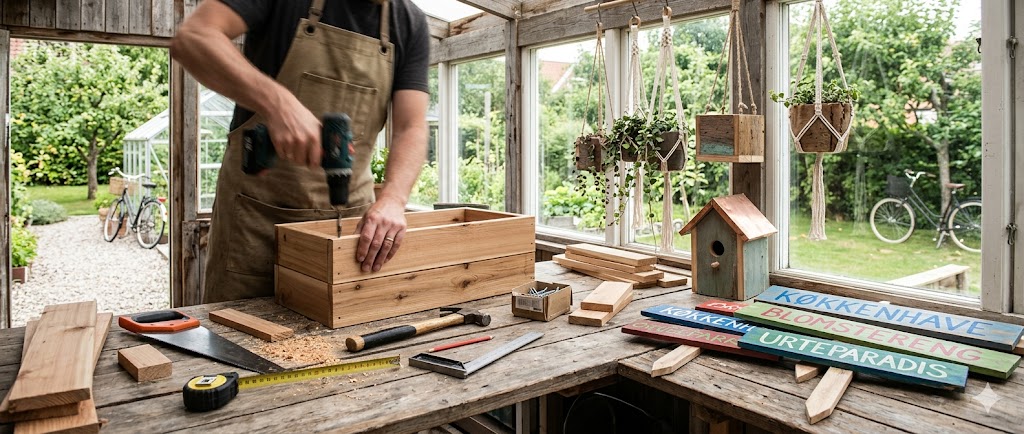
Sometimes the best garden features are born out of pure necessity. I recently faced two separate problems near my patio: I desperately needed a convenient "wet zone" to quickly fill watering cans or wash my hands, and my newly planted grapevines needed a sturdy trellis to climb.

Instead of sinking a boring metal post for the hose and stringing up some ugly wire for the grapes, I decided to combine both needs into one beautiful, highly functional focal point. The best part? I built it over a weekend using mostly leftover pallet wood and scrap lumber.
Here is the step-by-step breakdown of how I built this space-saving, dual-purpose garden station.
Step 1: The Pallet Wood Base
Every gardener has a pile of scrap wood or old pallets waiting for a purpose. Grab your jigsaw, because it’s time to put them to work.
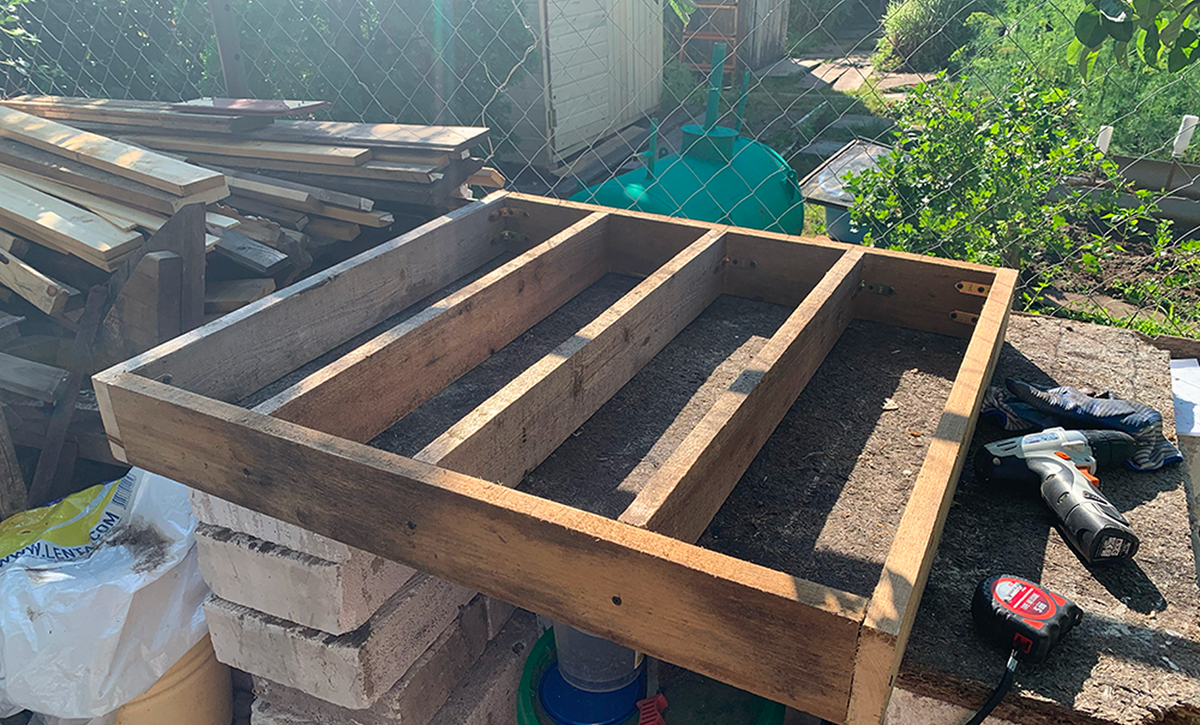
The Frame: I started by building a sturdy, box-like base. I used two longer pieces for the sides and two shorter ones for the front and back, adding three interior cross-braces for extra rigidity.
The Hardware: I used exterior-grade wood screws and metal L-brackets (corner braces) to secure the joints. This ensures the base won't warp or lean over time.
Step 2: Slatted Wood Cladding
To hide the rough frame and give the station a modern, finished look, I clad the outside using narrow wood slats (furring strips left over from a previous project).
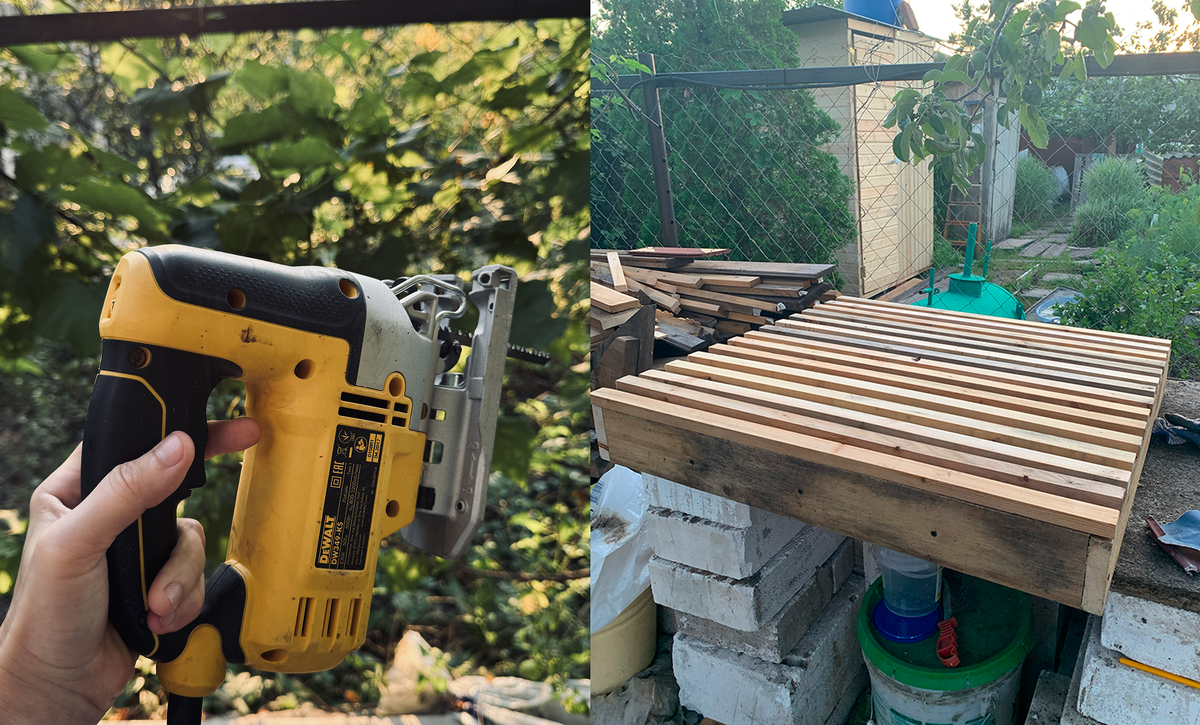
The Process: I sanded each strip lightly and applied a thin coat of protective wood oil.
The Secret to Perfect Spacing: I used a scrap piece of wood as a spacer between each slat. This guarantees perfectly even gaps, which not only looks like custom cabinetry but also allows for essential airflow so the wood doesn't rot from trapped moisture.
Step 3: Framing the Trellis
Next, it was time to build the climbing support for the grapevines. I decided to build two rectangular frames that would hinge together like a book, providing excellent wind resistance.
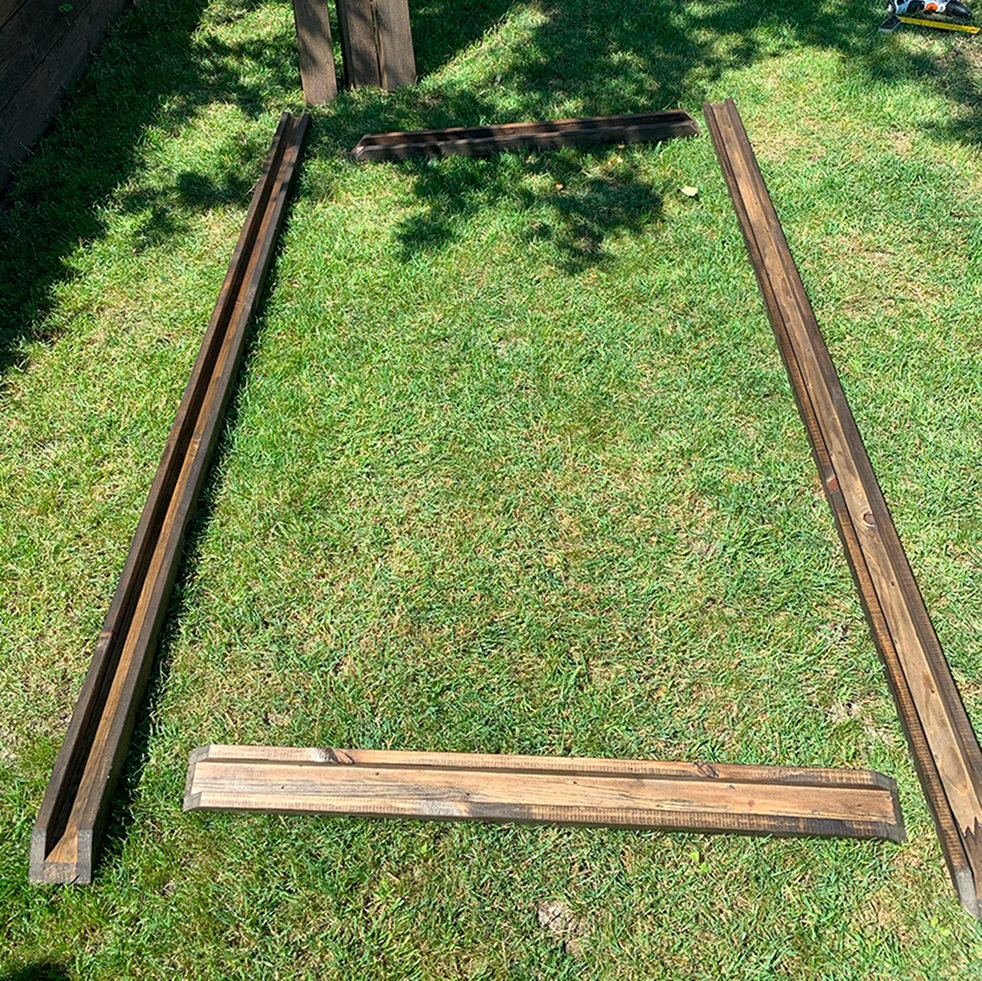
Working on the flat lawn, I screwed four sturdy pieces of lumber into a rectangle, using a carpenter's square to ensure perfect 90-degree angles.
Step 4: Creating the Lattice Grid
Once the outer frames were squared up, I started attaching the interior lattice.
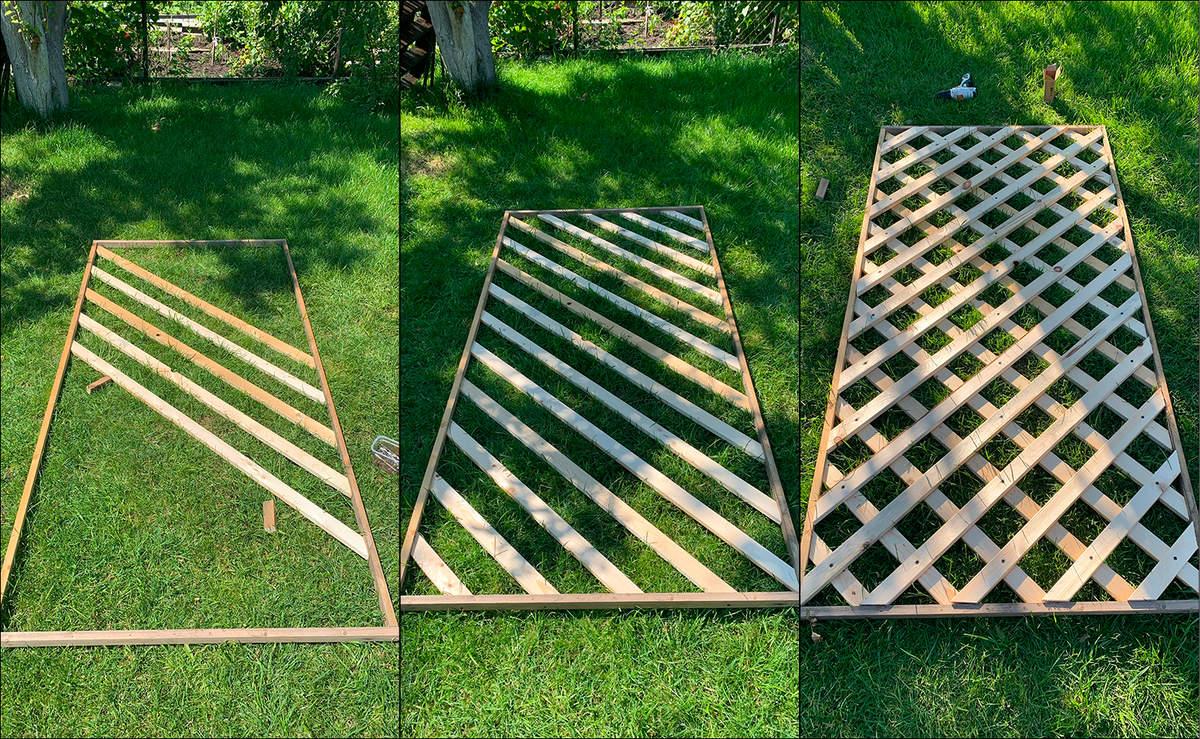
I cut narrow wood strips and attached them at a 45-degree angle, screwing them directly into the inside of the frame.
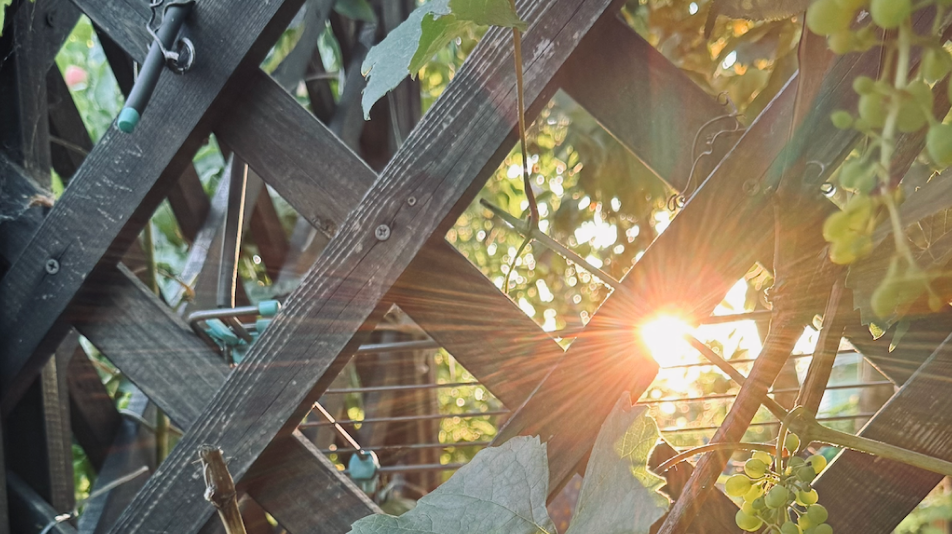
Once the first direction was fully installed, I repeated the process in the opposite direction. The result is a classic, sturdy diamond lattice that looks like a vintage French garden window. It’s the perfect structure for grapevine tendrils to grab onto!
Step 5: Stain and Final Assembly
Before putting everything together, weatherproofing is absolutely mandatory.
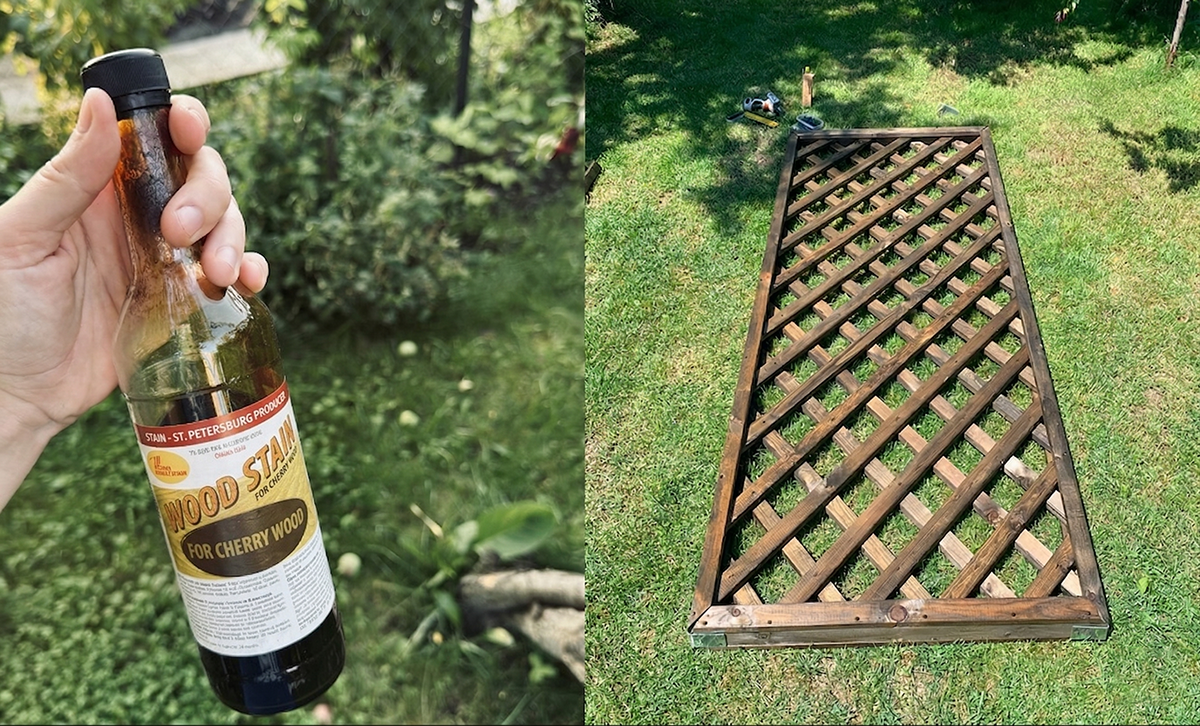
Staining: I chose a dark, UV-resistant exterior wood stain and sealer. I applied two thin coats with a brush. The dark finish brought out the natural wood grain and provided a beautiful contrast to the green foliage.
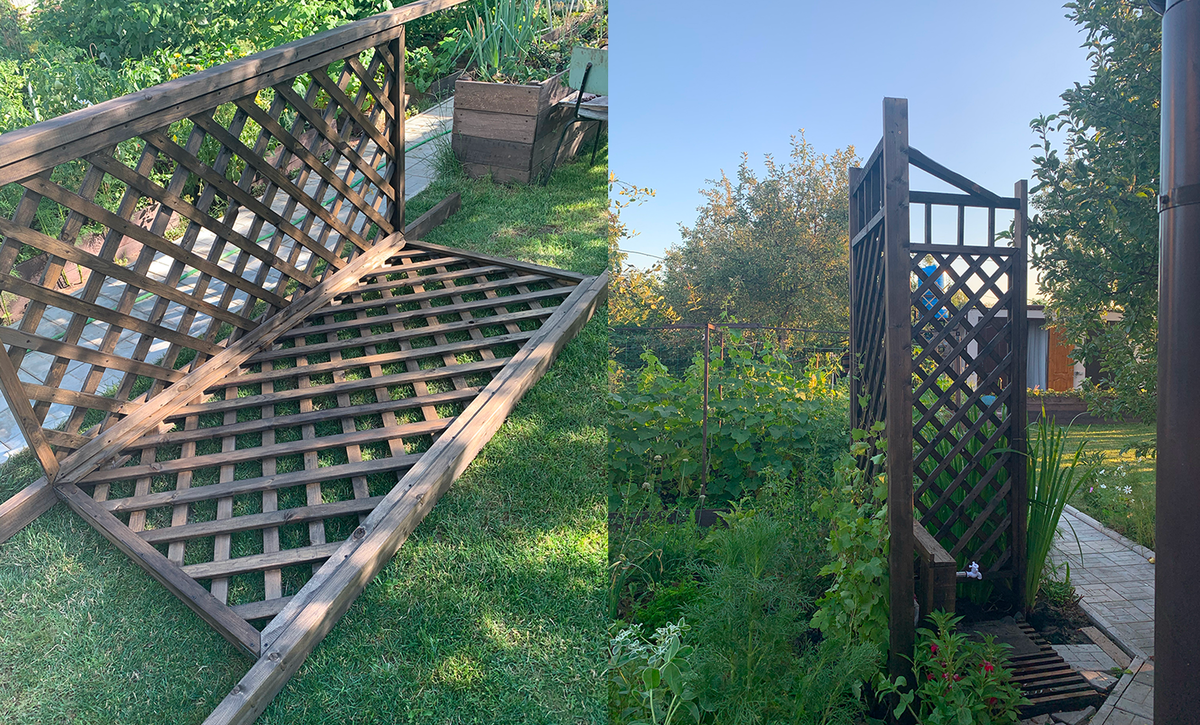
Assembly: Once dry, I connected the base box and the two trellis panels using heavy-duty corner brackets and long screws.
Step 6: Installation and Anchoring
You want this structure near your garden beds but accessible from the patio.
To keep it stable against heavy winds (and the future weight of grape clusters), I dug a shallow trench for the base to sit in. I drove rebar stakes deep into the ground inside the base box and secured the wood frame to them. I then filled the base with decorative stones for extra weight and drainage.
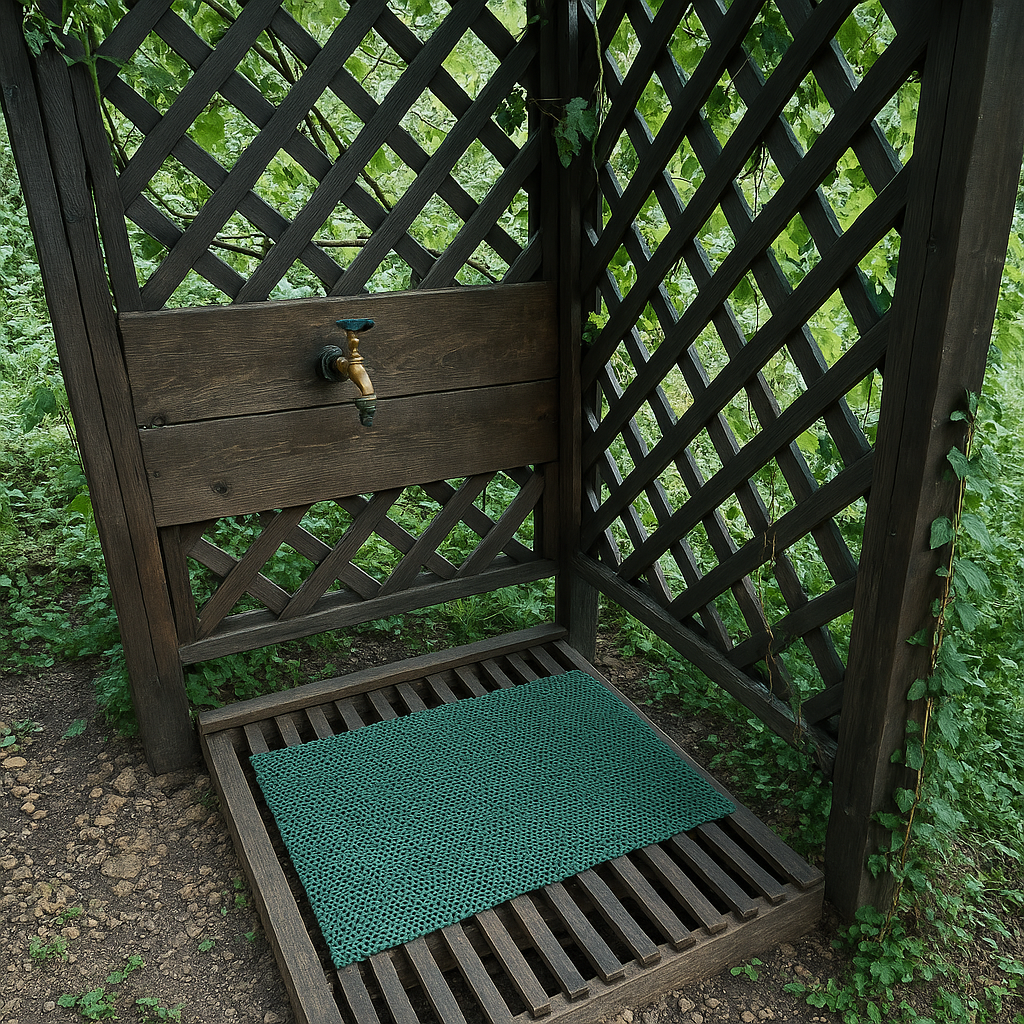
Step 7: The Plumbing and The Plants
For the final touch, I routed my garden hose up through the back of the station and attached it to a brass spigot mounted right on the wood panel. I placed a small drip tray underneath.
Within a few weeks, my grapevines began to weave their way through the diamond lattice, creating a stunning living wall that perfectly frames the water station.
My Top Woodworking Tips for Gardeners:
Use Dry Wood: Never build with wet or freshly treated lumber; it will warp and twist as it dries in the sun.
Pre-Drill Your Holes: Always pre-drill your screw holes, especially near the ends of slats, to prevent the wood from splitting.
Don't Skip the Gaps: Leaving small gaps in your cladding ensures proper ventilation, extending the life of your wood.
Final Thoughts
You don't need a massive budget to add custom, high-end features to your backyard. By upcycling old pallets and combining a watering station with a trellis, I saved money, saved space, and created a piece of garden decor I am truly proud of.


 DIY & Decor
  Edible Garden
  Houseplants
  Lawn & Landscaping
  Outdoor Plants
  Tips & Tools
No comments yet.